

Expert Blog
How handstands could improve your climbing
Have you ever noticed how much fun kids have when they’re doing handstands and cartwheels? That is probably because kids love to move their bodies around in every direction possible and love to look at the world from different perspectives.
Adults seem to have forgotten just how much fun (and how useful) a handstand can be!
Switching back from being a stiff adult to a flexible kid isn’t easy! The best way to start is to slowly work your way up to a full handstand. Holding a full handstand doesn’t have to be your goal. Just a few simple strength exercises above your head are enough to improve the overall health and flexibility of your musculoskeletal system:
- The circulation in both your head and upper body changes during the exercises for a short time. That can be enough to stimulate your circulatory system
- Stable upside-down over-head exercises work the torso and shoulder muscles. This is important for balance, strength, and the active mobility of your upper body.
- As one of the main stabilizers of the scapula, the serratus anterior muscle is specifically targeted in such exercises. This muscle is often skipped in weight training. The result can be a variety of discomfort in the shoulder joint and shoulder girdle due to muscular disharmonies and imbalance.
- Supporting your body upside down (upwards over your head) is an excellent compensatory component for climbing
These exercises are not just simple “antagonist training”
The exercises described here are not just simple “antagonist training” as handstands are often described. The undifferentiated division into agonist and antagonist reveals a superficial understanding of the complexity of functional-anatomical relationships of climbing movements.
Rather, in these exercises, corresponding muscle loops, that are often neglected, or only half trained during climbing, are trained in very specific patterns. The “small” movements used to control uncomfortable body positions often produce the stimulus required to train the right muscle groups.
The correct execution of the following exercises is shown and described in each of the photos. A mirror or a training partner can be very helpful in practicing!
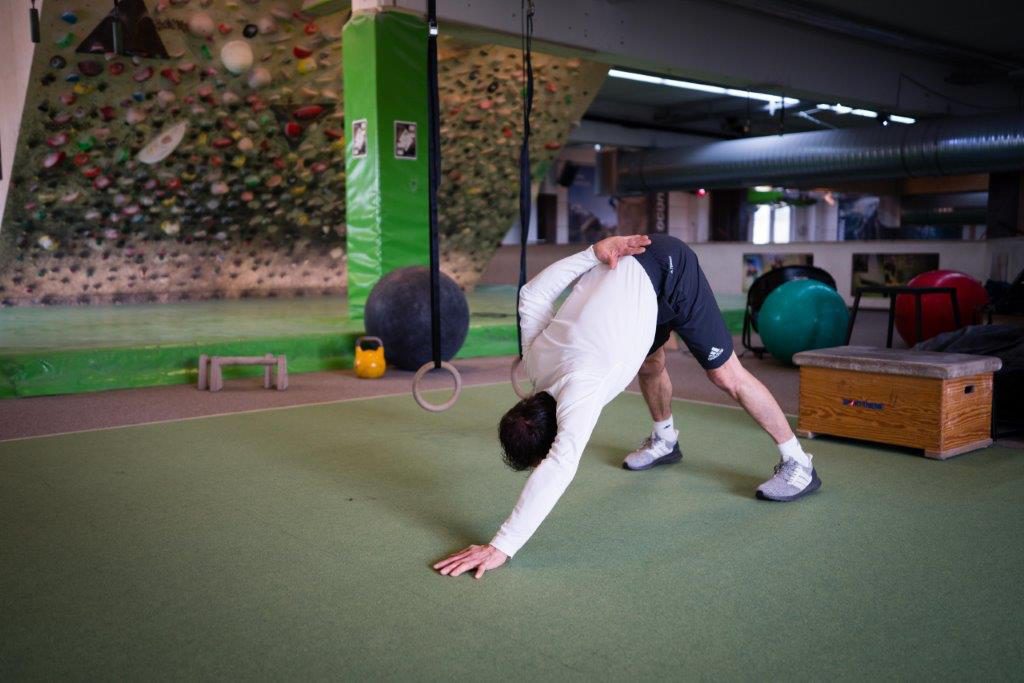
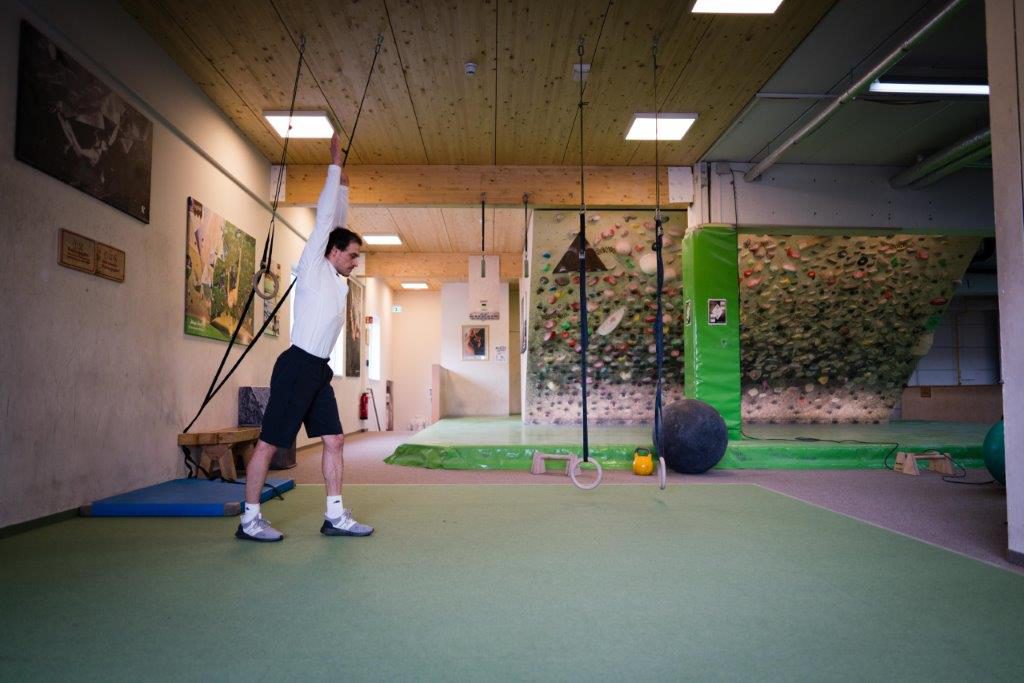
Exercise 1: Triangle
Starting position as shown in photo
It is important that you stretch the arms and the elbow and shoulder joints as far out as possible and straighten your back (stretching).
Stretch out your leg and stand with your whole foot (!) on the ground. Only your hip joint is bent.
If you have problems with this, bend your leg slightly in the knee joint. Keep your back straight!
Stretch your other leg straighten back. This is not easy and requires strength and agility in combination.
You might feel like your position is perfect until you see yourself in a picture or in the mirror. Do not worry, I feel the same way and I also have to practice a bit (see photo) 😉
Now raise and lower the heel several times, whilst keeping the rest of your body as close to the starting position as possible.
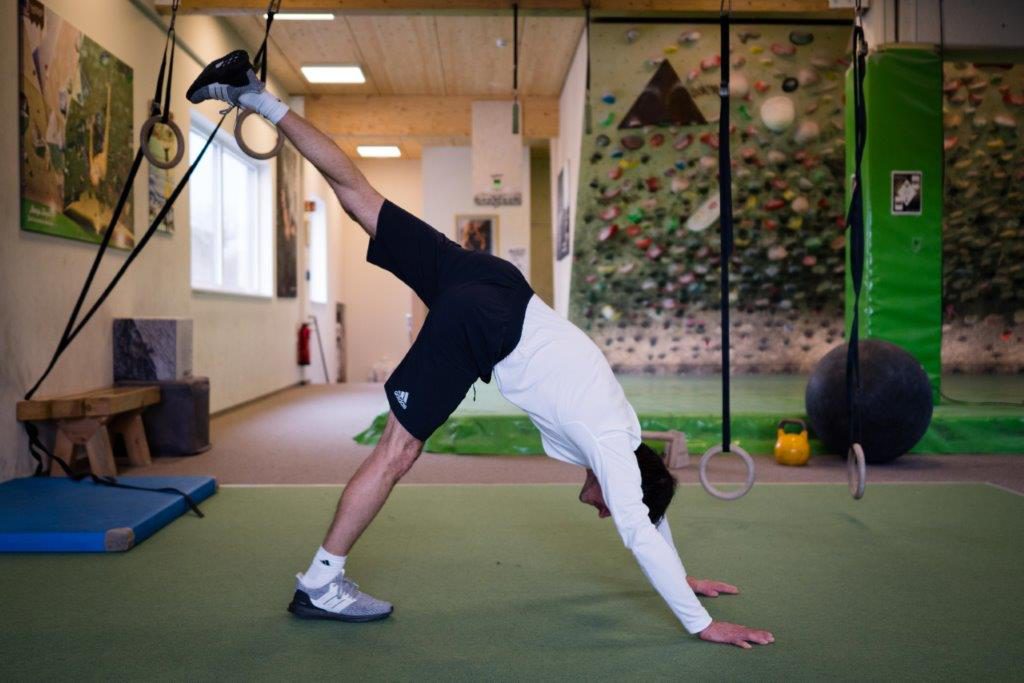
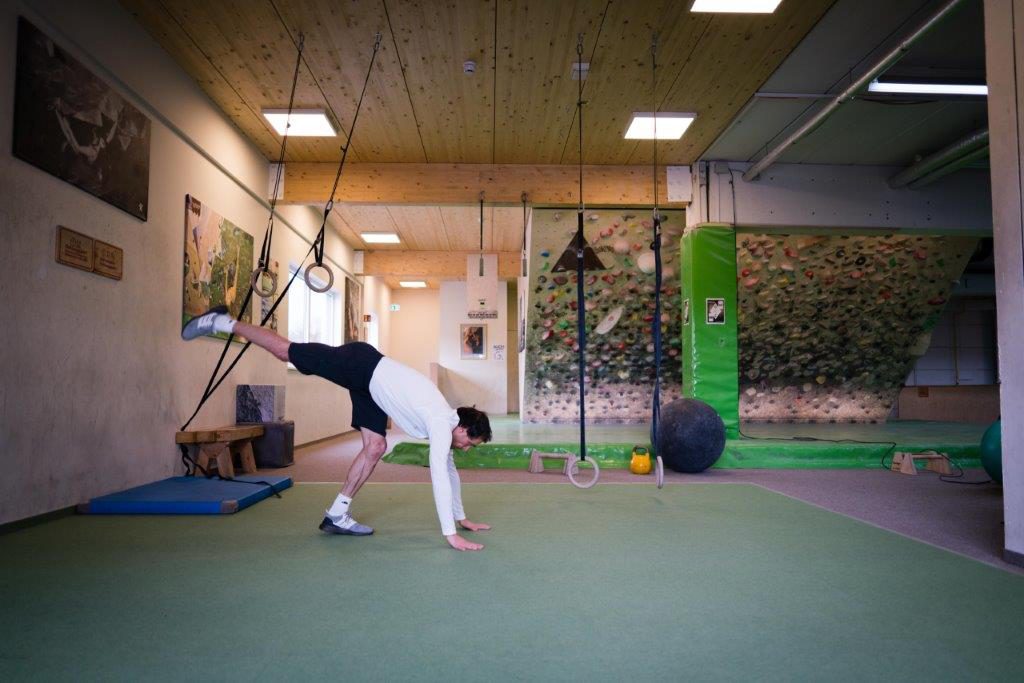
Exercise 2: Yoga push-up
For this exercise, you should have experience with the downward facing dog position from yoga. Bending your legs in the knee is okay, as long as your back is straight and your arms remain stretched at your shoulder joint.
Put one arm on your back, so that only one is supporting you on the ground.
Slightly bend your elbow (not much, only about 10°) and then push back to the starting position. Exhale and turn your elbow inwards.
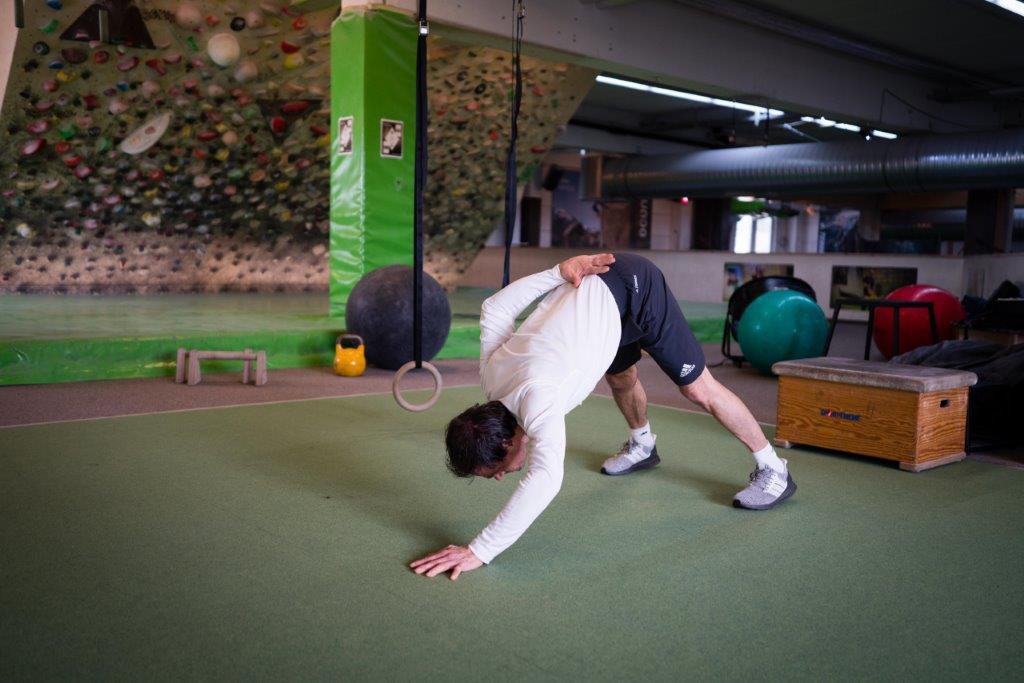
Maintaining the correct posture during this exercise is the goal; not trying to lower your arm all the way to to the ground!
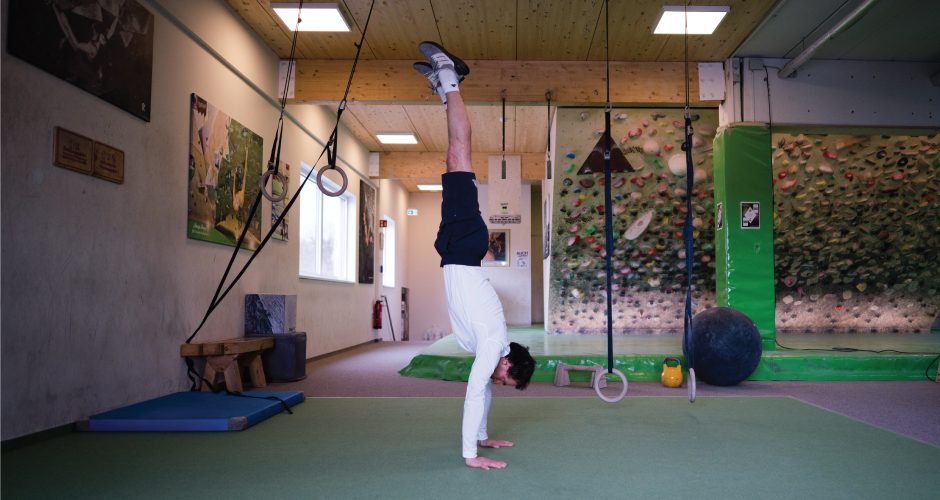
Exercise 3: Scissor kick handstand
The scissor kick handstand is first step to a held handstand. If you have practiced the triangle well, it will be much easier for you.
Bend over and place your hands flat on the ground at shoulder width. Gently swing up with your first leg, bending your hip. You can lightly push up from the ground with your other leg. Straighten your legs together over your head and tense your buttocks and shoulders. You can balance with small corrections in both wrists. Stretching out your toes gives you bonus points!
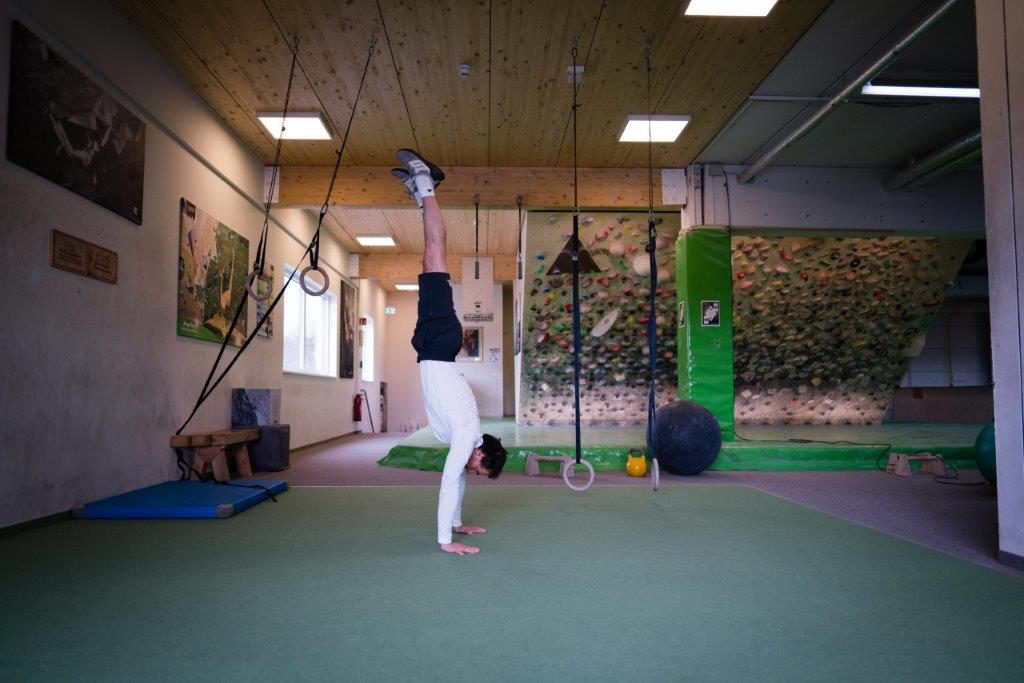
Challenge: Time yourselves – who can hold the handstand for the longest?
Exercise 4: Handstand on a box
Starting position as shown in the photo.
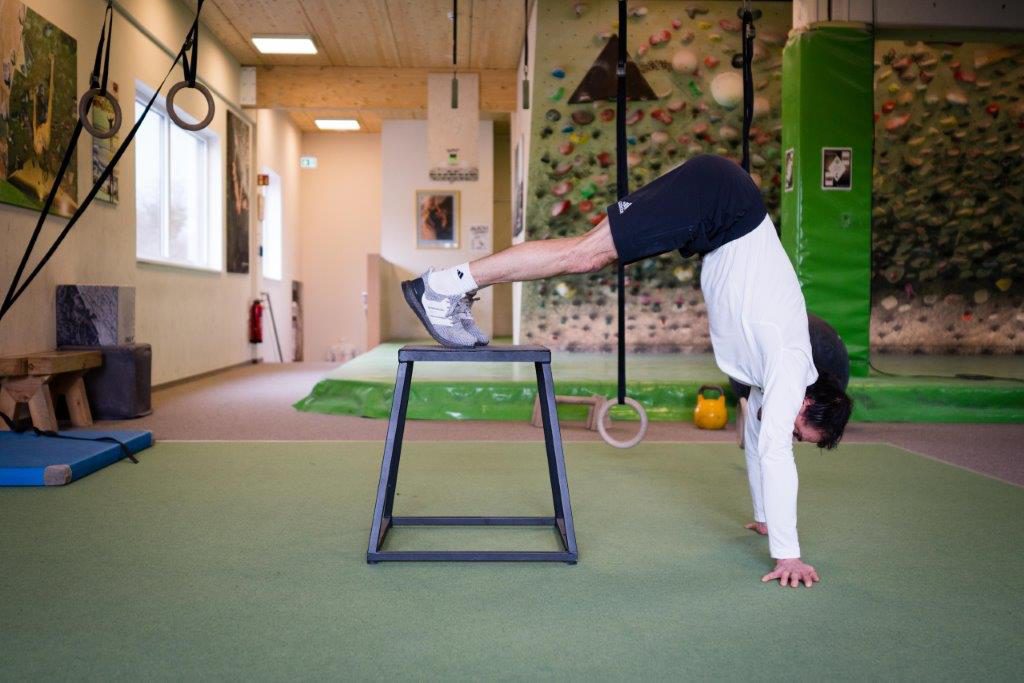
It is important that you stretch the arms in both the elbow and shoulder joints as far as possible and straighten your back (stretching).
Your legs should also be stretched, bending only at the hip joint.
Slightly bend your elbow (not much, about 10°, a complete push-up is not the goal) and press yourself back to the starting position. Exhale and turn your elbows inwards.
Repeat this exercise 4-8 times
Variation: Walk around the box
Starting position as in previous exercise.
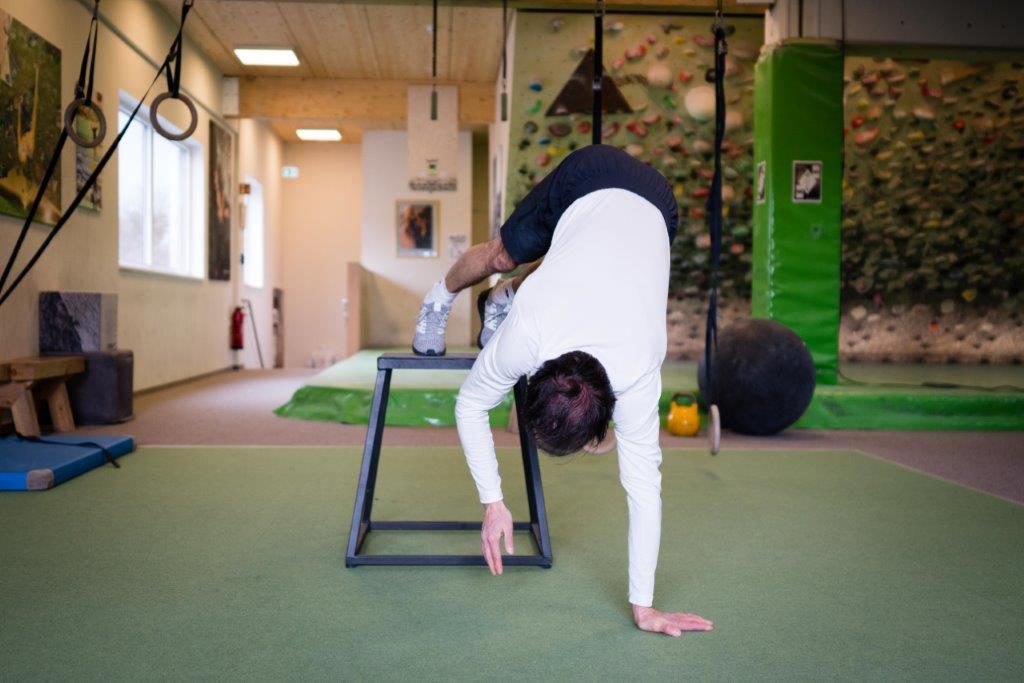
This time you try to circle the box with a half or full circle. Keep both your shoulder joint and in your back as outstretched as possible.
Have fun praticing!
Product recommendations: